
Makerspace Mandates: The Secrets to Perfecting an Educational Environment
Long before the drones, robots and curriculum developed today, PCS Edventures was Pat’s Computer School, a simple garage makerspace focus on educating the future's best minds. 30 years later, we've stayed true to our roots. We've grown alongside our students, honed our skills and expanded and refined our capabilities to become experts in education, after-school environments and makerspaces. Now, we're sharing our knowledge with you!
Called the Makerspace Mandates, these are the seven secrets to creating the best learning environment inside your makerspace.
As teachers and lifelong learners ourselves, at PCS Edventures, the Makerspace Mandates are our reminders that a learning space isn’t great because of its assortment of supplies and technology. Instead, what makes an environment special is a person who can facilitate learning in the most constructive and personalized way possible. Even if your makerspace houses the world’s most cutting-edge equipment, you won’t be seeing the results you want unless your students are interacting in an atmosphere built around experimentation - one that encourages exploration, design, failure and re-design.
1. Feedback & Motivation
In your makerspace, there is one key mantra every instructor should have: to be an effective teacher, your students need to be engaged. When they’re engaged, the world is their oyster. To effectively engage your learners, you’ll need to shake up the traditional teaching model a bit. It’s been found that when students are directed by an expert to follow a pre-established sequence of instructions, it generally does very little to encourage them to develop and consider their own analytical process. If something is confusing, the resolution is obvious — ask the teacher. However, it’s been shown that learning is exponentially more effective if students create solutions to challenges by seeking various resources to develop those solutions. The ultimate goal for your makerspace is for students to generate novel and innovative solutions to problems.
To achieve this goal, you need to remodel how you approach feedback inside the makerspace!
Since the process of construction, testing, analysis and reconstruction can take some time, it's ideal if no step along the way is bogged down by the need for excessive feedback. Traditionally, classroom feedback comes from the instructor.  With many students and one instructor, this means that any individual learner’s process can be repeatedly slowed by what's known as the feedback bottleneck.
On the other side of the coin - a place where learners explore uncharted territory without any feedback - students can find themselves in a sort of limbo, often discovering that they have been moving in a non-productive direction for some time.
Not only can students find themselves stuck waiting for feedback or lost without any, but instructor comments can also be interpreted as having hidden or counterproductive messages by students who receive abstracted information (grades, percentages, points, etc.). From these abstract concepts, students tend to take the now negative feedback one step further by actively judging themselves and their peers to establish an intellectual hierarchy. In addition to these habits reducing motivation among both high and low achieving students, they can also severely hinder the development of effective collaboration skills.
Now, to avoid this, it’s been shown through extensive studies and test groups that it is far better to provide students with immediate, continuous feedback, coming directly from their personal experience.  This is one of the primary goals of hands-on, activity-based learning. With this type of feedback, as learners move through the development of a project, they repeatedly observe the results of their work, making adjustments based on their natural learning process.
In doing so, motivation tends to shift from extrinsic to intrinsic as students focus on the task at hand rather than on others’ perception of their skill value.
Feedback in your makerspace is still crucial, you don’t want anyone lost, confused and frustrated, but feedback shouldn’t be something that learning hinges on. Work your way around your makerspace, encourage your students throughout their design and construction processes, provide feedback, help where you can and actively motivate your learners to explore and innovate. If you can support the natural learning of your students, the items in your makerspace won’t matter. Kids are kids, and whether it’s through a cardboard paper towel roll or a 3D printer, their imaginations and insatiable drive to investigate will always drive their learning. It’s your job to fortify this search for knowledge through continuous feedback and encouragement.
2. Finding the Zone
When you’re working to encourage natural learning within your makerspace, one of the most important things to keep in mind is the Zone of Proximal Development (ZPD). First introduced by Lev Vygotsky in 1978, who defined the ZPD as:
“The distance between the actual developmental level as determined by independent problem solving and the level of potential development as determined through problem-solving under adult guidance, or in collaboration with more capable peers" (Vygotsky, 1978, p. 86).
The ZPD has since been developed to represent the sweet spot between what learners can do without help and what they cannot achieve by themselves.
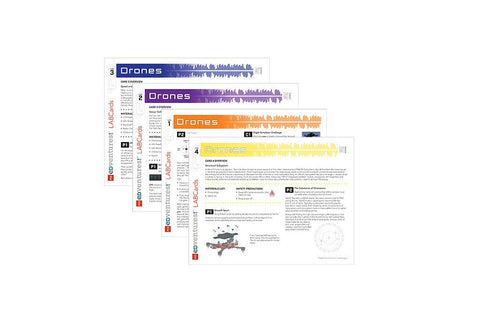
At PCS Edventures, one of the ways we’ve revolutionized the ZPD is through an innovative curriculum approach we call LABCards. These LABCards work especially well in makerspaces, as they provide a tool that enables a more student-directed experience. Rather than being bogged down with curriculum and instruction, they also empower educators to provide more facilitation, coaching and mentoring of natural learning as students work independently and in their own fashion.
The LABCards start simply. By taking advantage of a differentiated instruction model, instructors can “level” the playing field inside their learning space by breaking down the unique challenges into small, consumable and quick-paced chunks, allowing students to quickly master skills and move forward.
Let’s take Discover Drones, our educational racing drone package, for example.

With four levels of constructive learning, 5 LABCards are used to guide each learner through their journey towards first-person drone piloting. In these levels, each of the four LABCards are assigned a point value for quick and easy assessment of progress, providing students with immediate recognition of their accomplishments. Similar to gaining points towards a high score in a video game, students earn 5 points for each card they successfully complete. Each level includes four, 5-point cards and culminates with a 5-point end design project, for a total of 25 points per level. By completing all four levels, students can earn up to 100 points!
But, how do the LABCards work?
In the projects contained within the cards, students are introduced to new skills and concepts. Depending on your learning environment and the students working with the cards, you might choose to lead a mini-lesson that guides the group through each project before breaking apart to explore the challenges themselves.
 In a more student-driven makerspace, students can instead read through the projects independently or in groups. This arrangement leaves instructors free to serve as a coach and facilitator. If students get lost along the way and aren’t sure what to do next, pick up the LABCard and read it through with them, modeling the initiative, curiosity and openness to learning you want to cultivate. If you see an opportunity to expand on a particularly interesting topic or notice that students need more support in a few areas, step in and take the lead. Other times, step back and let your students guide their own learning.
In your makerspace, try to model what the LABCards achieve. You want your learners to have enough structure that they aren’t lost, but also enough freedom to create and explore the areas most interesting to them. By maintaining this level of “constant” learning, a place full of small knowledge triumphs and advancements, you’ll be able to max out each student’s time within the ZPD.
3. A Laboratory Mentality
Can you think back to the first time you entered a laboratory? The beakers, the smells, the lab coats — it was a safe place for students and instructors to experiment and design together. Whether your experience started with an after-school program, an elementary field trip or a high school chemistry class, one thing was for sure the moment you entered the lab — safety was and should always be your biggest priority. From strict rules about the type of footwear allowed to eye and ear protection, the lab hinged on controlled, calculated measures of safety. Don your personal protective equipment and you suddenly had the freedom to work with volatile chemicals or explosive agents without the worry of personal injury. You were safe to experiment, learn and grow.
It’s this idea you need to mirror in your makerspace.
Now, let’s take the high school chemistry class for example. All over the nation, schools pack labs full of combustible materials and dangerous elements, sprinkling in a new batch of the world’s most explosive component every hour — teenage hormones. It’s a recipe for disaster. Yet, day-in and day-out, the labs manage to avoid an incident. While it seems like an incredible feat, it’s an achievement the instructor scaffolded the first day of lab, a framework that continues to build each day.
They shifted their student’s perceptions of the environment.
While your learners will be surrounded by their peers, learning, building and investigating together, the makerspace is a different environment than a typical classroom, and it needs to be treated as such. Think of your makerspace as a laboratory, one with defined rules and safety procedures. While it’s a place of learning, the well-being of the people there takes priority over everything else. Now, this is a fine line to walk. On the one hand, safety is a priority, but on the other, you don’t want to discourage and scare students away from ever investigating outside of their comfort zone. Through your procedures and precautions, you want safety to become second nature. When this happens, not only is it no longer seen as a burden, but safety is seen as a tool. When students know they are adequately protected, nothing is stopping them from experimenting and investigating the odds and ends of your makerspace.
For the in-depth blog on the laboratory mentality, click here!
4. Build a Community
While it seems fairly straightforward, one of the biggest hurdles for your makerspace will be creating a positive learning community.

From bouncing ideas off of one another to peer-based assistance in projects, not only will a strong community work seamlessly with one another, but you’ll also be preparing your students for their future careers.
To build a positive learning community, you need to focus on three main things: Communication, Collaboration and Feedback.
Communication
One of the hardest things about learning is asking for help. Whether it’s our innate stubbornness or an aversion to “failure,” most of us would rather twiddle our thumbs than ask for assistance. In your makerspace, this is a problem. Your students need to know that they are safe coming to you or another instructor for questions, and, better yet, that they can ask their peers for help. For this to happen, your makerspace needs to fall into a natural learning environment. As stated earlier, once the environment is encouraging, and once questions and investigation are seen as a positive thing, you’ll be able to open the floodgates of communication.
Collaboration
Just as with communication, you want to encourage your makerspace attendees to work together to solve problems. To key in on collaborative experiences, try to include some group activities in your space.  From a well-timed group brainstorming session to team challenges, these exercises will strengthen the bonds between your learners and greatly improve their future interactions within groups. Discussions are also a great way to encourage group learning and positive experiences. On the impacts of collaboration, the Cornell University Center for Teaching Excellence says:
Research shows that educational experiences that are active, social, contextual, engaging, and student-owned lead to deeper learning. The benefits of collaborative learning include:
- Development of higher-level thinking, oral communication, self-management, and leadership skills.
- Promotion of student-faculty interaction.
- Increase in student retention, self-esteem, and responsibility.
- Exposure to and an increase in understanding of diverse perspectives.
- Preparation for real-life social and employment situations.
Feedback
As outlined earlier, feedback is essential in any learning environment. To make the most of the feedback in your makerspace, look to promote natural learning through immediate, continuous feedback, coming directly from their personal experience.
...
Now, while these are the three major contributions to a positive makerspace community, every learning environment is unique and requires different attention. Take the time to see what you can do to have the best positive effect on your learning community, and make the changes necessary. From the moment your students enter, you want your space to buzz with the energy of discovery and knowledge. You want it to be a place where communication, collaboration and feedback are the foundational stones of exploration and investigation!
5. Failure is Awesome
This is a strange concept for most people as they were taught the opposite in school, but failure is a good thing.

Let’s take engineering, for example. As a student builds, their construction might fall over or they might struggle with the design challenge. While these moments are frustrating, they are good for learning! The failure needs to be encouraged, so long as that when it happens, the student is not disheartened, embarrassed or upset, but instead more determined to get it right the next time. They haven’t failed! Simply learned the best way to not do it. The challenge after the failure is to problem solve and figure out how to be successful at whatever it is they are doing.
For this to be an effective learning technique, as an instructor, it comes down to you. Some students will have the ability to persevere through the failure without help, but others will need a lot of encouragement to keep going. When this happens, start by breaking down the failure with the student. What went wrong? What needs to be fixed? How can the project be improved? What other aspects of the space can they incorporate into their design? Instead of having them focus on the negatives, instead, pose the failure as an opportunity to get it right.
6. Listen to Your Audience
The students are your biggest critics. From what they share with their parents to what’s said in the hallways of their school, their impressions and reactions to your makerspace have a massive impact on performance and attendance numbers. To put it bluntly, they need to enjoy being in the makerspace. Now, this goes past just supplying them with new tools and gadgets — you need to bring their interests to them. They know what they want, they know what they’re interested in and they aren’t afraid to tell you. It’s up to you to listen.
On paper, this seems pretty straightforward, but it’s more challenging than that. This is mainly because of the difference between being engaged and being interested. Your students will work hard. They’ll try new things, and they’ll innovate, but, a lot of this is simply due to being engaged in the task. Because of the break from traditional classroom learning, they’ll feel refreshed as they explore the makerspace. But, more often than not, the exploration is based primarily off of it simply being something different.
You need to find out what they’re interested in. What are they passionate about?
Now, there are various ways to learn their interests — questionnaires and group discussions — but the right way is dependent on your environment and your students.  Listen to what the learners are talking about, engage with them on a creative level and gauge their reactions to new additions to the space. To kick your makerspace into high gear, look to make the leap from engaged to interested. Find their passions and allow them to freely explore them!
7. Have Fun!
It’s short, it’s simple and it’s the most important. Your makerspace should be fun! Students should be excited to spend their time there, to investigate, to design, to fail — to make. Too often, we get caught up in the newest standards, the newest curriculum and development, and we forget what learning is really about.
Learning is about the freedom of discovery. It’s about investigating your curiosities and chasing after your imagination. It’s about exploring the unexplored and diving into new worlds. It’s about having fun. From laughter and cheers to shock and awe, do what you can to build an exciting, exhilarating space — and make sure you’re having fun alongside your students.
After all, it’s why you started your makerspace, right?